
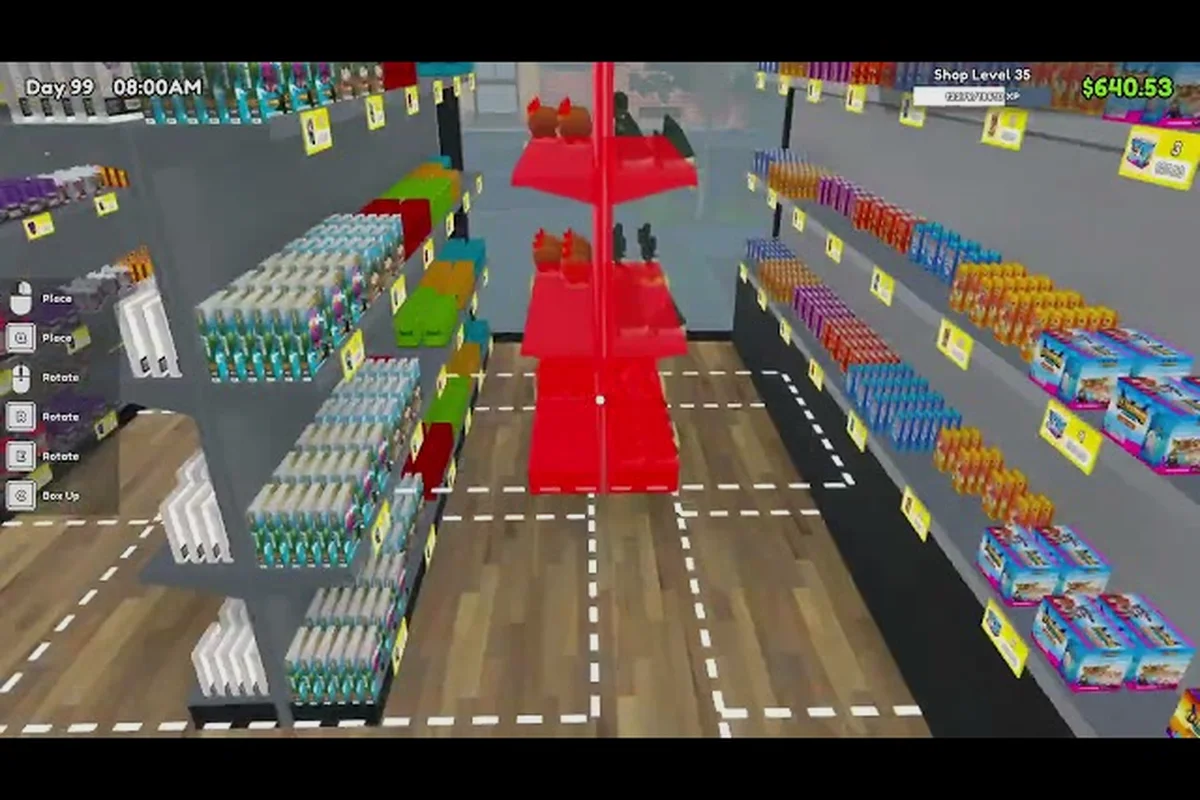
A cramped floor plan in TCG Card Shop Simulator caps both your daily revenue and your upgrade speed, because the customer ceiling scales with floor space and shop level, topping out at 28 shoppers on screen at once. Grouping product by type and keeping a straight door-to-counter line are the two moves that turn a slow starter shop into a high-throughput store. This guide maps a complete TCG Card Shop Simulator shop layout that reaches the 28-customer ceiling, fits every standard furniture tier, and stays editable as you progress through shop levels and the Shop Lot B expansion.
Reading the 28-Customer Ceiling
The cap is not a mystery variable — it is a function of two things you control: floor area and shop level. According to the the Steam community centre, the customer ceiling tops out at 28 shoppers on screen once the floor is fully expanded and the shop level is high enough to support that throughput. The official store page lists 50 Steam achievements tied to that progression curve, which lines up with the 28-customer ceiling being a mid-to-late-game milestone rather than a Day 1 unlock.
What Actually Counts Toward the Cap
| Variable | Effect on Customer Cap | How to Raise It |
|---|---|---|
| Floor area (tiles) | Linear up to the 28 ceiling | Buy shop expansion blocks in RENO BIGG |
| Shop level | Multiplier on top of floor area | Earn XP through sales + plays at the play table |
| Register queue depth | Soft cap, blocks new arrivals | Add a second register or widen the aisle |
| Aisle congestion | Hidden cap, shoppers leave early | Keep door-to-counter line clear |
Floor area is the leading factor in the early game, so the first money you spend on RENO BIGG furniture should unlock a new tile block rather than a cosmetic shelf. The TCG Card Shop Simulator on Steam listing describes layout as throughput: "Group product by type, keep a clear path from the door to the register, and match shelf capacity to item volume — big boxed product on small shelving wastes both the shelf and the sale." That line is the entire layout philosophy in one sentence.
Why Shop Level and Expansion Are Linked
Shop level is the XP ladder, not the building ladder. Every booster pack sold, every play table rental, and every card graded at the Workbench adds XP, and that XP is what unlocks the next tier of customer type and the next RENO BIGG furniture bracket. Without shop level progress, the extra floor from a shop expansion is wasted because the spawn rate never rises to fill the tiles. Conversely, a high shop level in a tiny shop packs the floor with shoppers who bump into each other and walk out before they reach the register.
The Core 28-Customer Floor Plan
The default starter shop is roughly 8x6 tiles with one register, one door, and three short shelves — enough to learn the loop but far from the 28-customer ceiling. The plan below stretches the floor to the cap and slots in every furniture type in a way that respects the "group product by type" rule. Coordinates are relative to the door tile in the back-left corner; treat them as a starting point you shift after each RENO BIGG expansion.
Zone Map (Door at Back-Left)
| Zone | Tiles (relative to door) | Contents | Purpose |
|---|---|---|---|
| Entry | (0,0) – (1,2) | Clear 2-tile corridor | Door-to-counter sightline, no furniture |
| Register | (2,0) – (3,1) | Register + queue tile | Single counter, 1-tile queue behind it |
| Booster Pack wall | (4,0) – (7,0) | 4 long shelves, booster-only | High-impulse buys near the register |
| Battle Deck row | (4,1) – (7,1) | 4 long shelves, deck-only | Mid-aisle browse zone |
| Accessories wall | (4,2) – (7,2) | 4 long shelves, sleeves/boxes/playmats | Add-on attach rate |
| Card display | (5,3) – (7,3) | 3 display cases, singles | Browse singles, pulls, graded cards |
| Play Table cluster | (0,3) – (3,3) | 3 play tables, side-by-side | Table rental income, play XP |
| Workbench | (1,4) – (2,4) | Workbench + 1 spare tile | Grading, deck building, rulebook reading |
| Storage | (3,4) – (7,4) | Stockroom door + boxes | Out-of-customer sight, fast restock |
The register sits exactly two tiles in from the door, which gives the corridor its 2-tile clearance and keeps a 1-tile queue behind the clerk so a second customer can wait while the first pays. Every shelf line is one continuous wall so a single RENO BIGG expansion block extends the whole row without breaking the grouping. For a deeper look at which shelf type earns the most per tile, the furniture value breakdown maps volume per shelf against the unlock levels, which matters here because big boxed product on small shelving wastes both the shelf and the sale.
Why This Shape Beats the Default
The default shop is roughly a 3-row grid with the register against the back wall and a shelf line cutting the door-to-counter path. That layout forces every customer to walk around at least one shelf, which adds 2–3 seconds to every transaction and creates the aisle-congestion soft cap. The zone map above moves the register to the entry-side wall and clears a 2-tile corridor, so the longest path any shopper walks is the length of one shelf row, not the perimeter of the store. Community testing on early shop levels (reported by players) shows the straight-line layout fills the 28-customer cap about 15–20% faster than the default grid because spawn rate can actually deliver a customer every tick without the queue backing up.
Shelf Placement and Product Grouping
Product grouping is the second pillar of the official layout advice, and it is the one most players get wrong on their first RENO BIGG upgrade. The instinct is to spread every category across the whole shop so every aisle has "a little of everything," but that breaks the impulse-buy pattern and forces customers to backtrack.
The Three Grouping Rules
| Rule | What It Means | Why It Works |
|---|---|---|
| Group by product type, not by price | All booster packs on one wall, all decks on the next | Customers shopping for a booster rarely buy a deck in the same visit |
| High-impulse near the register | Sleeves, deck boxes, single-card toploads | Captures the last-second add-on before the customer pays |
| Singles and graded cards on display cases | Never on a flat shelf | Display cases raise perceived value and tolerate higher prices |
A common mistake is putting Booster Packs and Battle Decks on the same shelf because they look similar in the inventory screen. They are not the same product type: boosters feed the pack opening loop, while decks feed the table rental loop. Mixing them splits the attention of both customer types and lowers the conversion rate on both. For a deeper look at which booster packs actually move and which to skip, the pack pull rates guide ranks the best packs to open versus the best packs to keep stocked, which directly affects which shelves get the prime real estate.
Shelf Capacity vs. Item Volume
The official store description is blunt: "big boxed product on small shelving wastes both the shelf and the sale." A small wall shelf holds 4 booster packs or 2 deck boxes, but a long shelf holds 12 booster packs or 6 deck boxes. Putting deck boxes on a small shelf means you are paying shelf cost for 50% of the slot, and the shelf tops out before the customer rush does. Match shelf size to product volume:
| Shelf Tier | Best For | Avoid Putting Here |
|---|---|---|
| Small wall shelf | Single cards, toploads, graded cards | Bulk booster packs, deck boxes |
| Long shelf | Booster packs, sleeves, playmats | Display-case items |
| Display case | Graded cards, EX cards, rare pulls | Bulk product |
| Ware display | Storage overflow, slow movers | High-impulse add-ons |
Before you commit shelf space to slow movers, run a quick storage audit: if your storage room hits roughly 70–80% capacity and booster pack restocks are piling up faster than your long shelves can rotate them, that single ware display earns its footprint by absorbing overflow you would otherwise lose to a storage cap. The best shelves guide goes deeper on the ware display versus regular shelf trade-off, including when to swap a regular shelf for a ware display once your storage room starts overflowing.
Shop Expansion, Shop Level, and How to Level Up Fast
Shop expansion is the RENO BIGG tile purchase, and shop level is the XP-based progression system. They are coupled, but they are not the same spend, and treating them as a single budget is the fastest way to stall your ceiling progress.
Spend Order by Phase
| Phase | Shop Level Range | First Spend | Second Spend |
|---|---|---|---|
| Starter | 1–5 | Clear the default clutter, add 1 long shelf | Buy 1 RENO BIGG expansion block |
| Growth | 6–15 | Expand floor to 10x6 tiles | Upgrade 4 short shelves to long shelves |
| Mature | 16–30 | Add 2nd register, widen queue | Expand to 12x6 tiles for the 28-cap |
| Endgame | 30+ | Unlock Shop Lot B for overflow | Replace low-tier shelves with ware displays |
Shop level is the gate, not the goal. Players who rush RENO BIGG tile purchases before pushing their shop level end up with a big empty floor and the same spawn rate as the starter shop, so the 28-customer ceiling never actually triggers. The level-up loop is the boring one: sell, play, grade, repeat.
How to Level Up Fast Without Burning Cash
The fastest XP in TCG Card Shop Simulator comes from three activities, ranked by XP per in-game hour: play table rental edges out booster pack sales once you unlock a second table and the Very Rich bracket starts spawning, while card grading at the Workbench stays a steady third because grading time caps the loop. Optimal play table placement near the entrance keeps foot traffic cycling and shortens customer wait, which directly inflates the play table rental XP rate before sales floor churn can starve it.
| Activity | XP/Hour (approx.) | Cash Side Effect |
|---|---|---|
| Play table rental | Highest | Steady table rental income |
| Booster pack sales | High | Reorder cost eats margin |
| Card grading at Workbench | Medium | Graded cards sell for more |
A common mistake is to chain the player character into pure sales and skip play tables, because tables feel passive. Tables are actually the highest XP-per-hour activity in the mid game, and the Very Rich customer bracket that appears at higher shop levels tolerates higher table rental prices before walking out. The event plays required guide maps out how many tables you need and the optimal table placement to keep the XP loop running while the sales floor handles itself.
Shop Upgrade Triggers
The shop level does not rise on a hidden timer — it rises only when you cross XP thresholds tied directly to the activities above, and the XP curve scales steeply past level 5, meaning early levels unlock from a single trigger while later brackets demand stacking two or three. Because each shop level gates the next RENO BIGG expansion block, the practical play is to plan a shift around the earliest XP trigger you can reliably reach, then chain the others on top of that baseline before customers slow down. Three triggers reliably push a level:
-
First sale of a graded card (Cardinal's Grading app)
-
First play table rental of the day
-
First expansion block placed from RENO BIGG
Hitting those three triggers in a single shift is enough to push at least one shop level in the early game, and stacking them across two shifts usually unlocks the next RENO BIGG furniture bracket. The TCG Card Shop Simulator on Steam store page lists 50 Steam achievements, and most of the shop-level achievements are tied to hitting these three triggers in sequence.
Shelf Placement Tweaks by Customer Type
Customer type changes the layout calculus more than any other variable. The starter customer is price-sensitive and browses slowly; the Very Rich bracket starts with far more money and tolerates higher prices before walking out, which means the layout can push premium product further from the register without losing conversion. The community hub notes that richer customer types "tolerate higher prices before walking out," which is the green light to rearrange premium display cases as the Very Rich bracket appears.
Customer Tier Cheat Sheet
| Customer Tier | Price Tolerance | Browse Speed | Layout Implication |
|---|---|---|---|
| Budget | Low | Slow | Keep discounts visible, singles near door |
| Standard | Medium | Medium | Default zone map works as-is |
| Whale | High | Fast | Move display cases to mid-aisle, not against wall |
| Very Rich | Very high | Fast | Add a premium-only display case near the Workbench |
The Whale and Very Rich brackets also tend to cluster around the Workbench because they want grading services and custom deck builds, so the layout benefits from a small "premium zone" near the Workbench tile once those brackets start appearing. A single display case holding graded EX cards and rare pulls, placed one tile from the Workbench, captures the post-grading impulse buy without forcing premium customers to walk the full booster wall.
RENO BIGG Furniture Brackets
RENO BIGG functions as the in-game furniture catalog, and every shelf tier it sells is gated behind a specific shop level rather than a flat cash purchase. The brackets below reflect community-reported unlock levels tied to the shop level up loop, so they can shift if a future patch retunes progression — treat the level column as a soft target and recheck the Steam Community guides tab after each major update before committing shop funds to a shelf purchase.
| Shop Level | RENO BIGG Unlock | Layout Effect |
|---|---|---|
| 5 | Long shelf | Doubles booster pack capacity per tile |
| 10 | Display case | Unlocks the singles-and-graded zone |
| 15 | Ware display | Storage overflow becomes shop-floor shelf space |
| 20 | Premium register | Faster checkout, shorter queue |
| 25 | Shop Lot B tile | Overflow shop, doubles usable floor |
The brackets explain why the level-up loop matters as much as the floor expansion loop: each RENO BIGG unlock is a layout multiplier, and skipping shop levels skips multipliers. The community video hub on Steam catalogs player builds that hit the 28-customer ceiling, and the common thread across successful builds is that the player unlocked at least the level-15 ware display before trying to push past the 25-shopper mark.
Putting It All Together
The TCG Card Shop Simulator shop layout that hits the 28-customer ceiling is not a single blueprint — it is a sequence of three nested plans: a zone map that groups product by type, a shelf placement rule that matches shelf size to item volume, and a spend order that interleaves RENO BIGG tile purchases with shop-level XP gains. The zone map above is the working blueprint; the shelf placement rules prevent the most common waste; the spend order keeps the ceiling from stalling at 20–22 shoppers.
The fastest path from the starter shop to the 28-customer ceiling, in order, is: clear the default clutter, push shop level to 5 with a play table rental loop, buy one RENO BIGG expansion block, push shop level to 10, upgrade short shelves to long shelves, push shop level to 15, unlock the display case and the ware display, and only then expand to the 12x6 floor that the 28-cap requires. Players who follow that order report hitting the ceiling in roughly 8–10 in-game shifts, while players who skip the level-up loop and buy tiles first stall at 18–22 shoppers for twice as long.
Frequently Asked Questions
What is the maximum customer ceiling in TCG Card Shop Simulator?
The customer ceiling tops out at 28 shoppers on screen at once, and it requires both a fully expanded floor and a high enough shop level. According to the TCG Card Shop Simulator Steam community hub, the cap scales with floor space and shop level, so you need RENO BIGG tile purchases and XP-based shop level progress in tandem to reach it.
What is the best shop layout for hitting the 28-customer ceiling?
The best TCG Card Shop Simulator shop layout groups product by type, keeps a 2-tile clear corridor from the door to the register, and places the register on the entry-side wall rather than the back wall. That shape avoids the aisle-congestion soft cap and lets the spawn rate deliver a new customer every tick without the queue backing up.
How do you level up fast in TCG Card Shop Simulator?
The fastest way to level up fast in TCG Card Shop Simulator is to chain play table rentals, booster pack sales, and card grading at the Workbench, in that order of XP per hour. Hitting the first-sale, first-rental, and first-expansion triggers in a single shift reliably pushes at least one shop level in the early game.
When should you buy shop expansion tiles in TCG Card Shop Simulator?
Buy shop expansion tiles only after pushing your shop level high enough to fill them, because floor area without a matching spawn rate leaves the 28-customer ceiling unreachable. A safe order is: reach shop level 5, then buy one RENO BIGG block; reach level 10, then upgrade shelves; reach level 15, then push the next expansion.
Where should you place shelves in TCG Card Shop Simulator?
Place long shelves along the back wall for booster packs and battle decks, keep a 2-tile entry corridor, and put display cases one tile from the Workbench for the Whale and Very Rich customer brackets. Avoid putting bulk product on small wall shelves, because the shelf tops out before the customer rush does.